Have you ever wanted to create a drop down list in Excel to avoid data entry errors or to make the data entry process easier?
In this post I’ll cover a whole range of tips on how to work with drop down lists in Excel including:
- How to create/modify drop down lists
- Create lists using information from other worksheets
- How to remove lists from a range
- How to copy lists from one cell to another
- Display a tooltip when a cell with a list is selected and when a wrong value is entered
- How to deal with a workbook with multiple different lists
- Create an expandable list
- Create dependent drop down lists
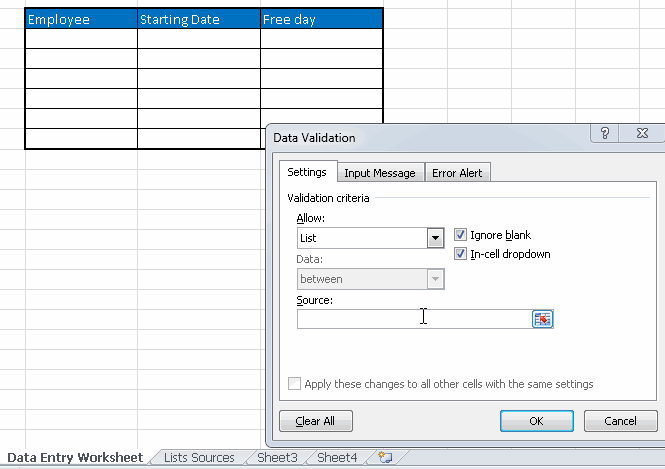
Excel has a feature called Data Validation that you can use to make sure the users of your spreadsheets enter certain values in the cells. The lists (or drop down lists) are a type of data validation used to make sure the users enter a value from a set of options.
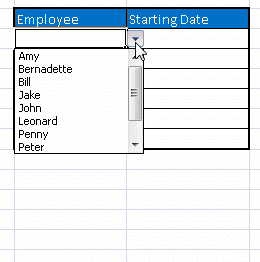
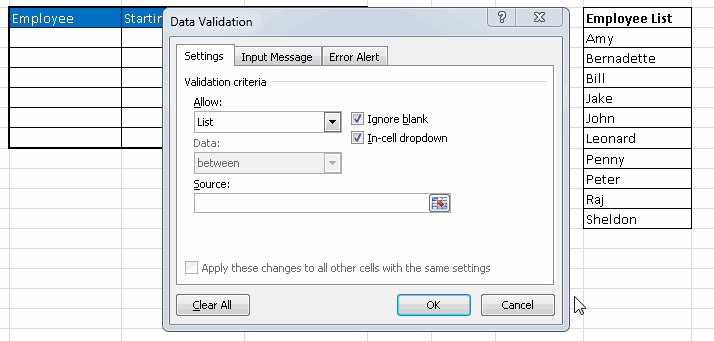
How to create/modify drop down lists
To create/modify a drop down list:
- Select the cell(s) where you want to create/modify the drop down list
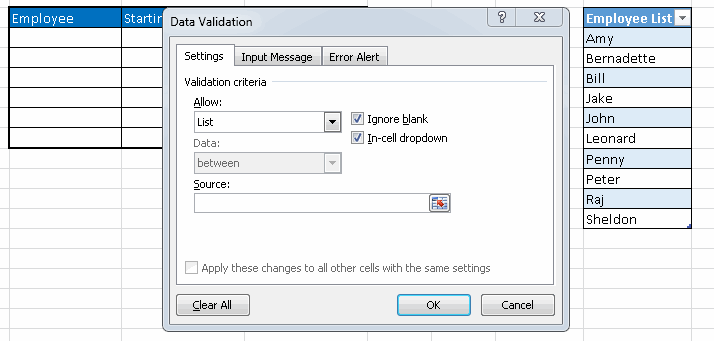
- Go to the Data tab and click on the data validation button

In the Data Validation dialog box click in the validation criteria selection button and select ‘List’:
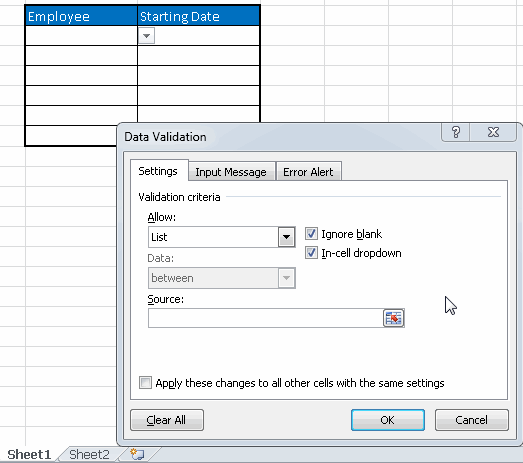
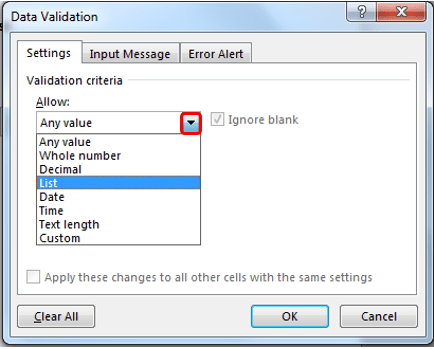 If you’re modifying an existing list, the validation criteria type will be preselected with the existing type.
- Enter the source for the list:
- The source can be entered manually, using commas to separate the options:
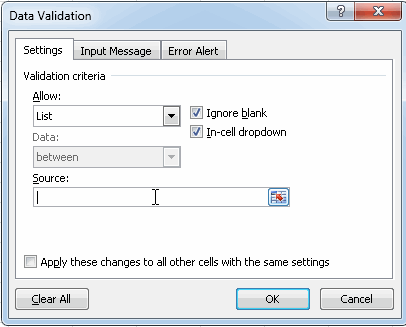 or it can be entered by selecting a range that contains the options you want in your list.
Create lists using information from other worksheets
If you’re using Excel 2007 or later you can create a drop down from a source range that is located in another worksheet.
To create a list from a range in another worksheet, in the Data Validation dialog box press the range selection button ![]() , and go to the desired range in the other worksheet.
, and go to the desired range in the other worksheet.
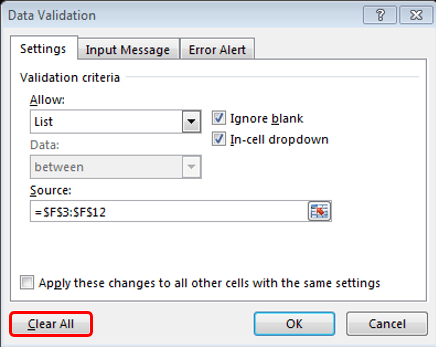
How to remove drop down lists
- Select the cell(s) where you want to create/modify the drop down list
- Go to the Data tab and click on the data validation button
- Click on Clear All
How to copy lists from one cell to another
- Select a cell that contains the drop down list you want to copy
- Copy the cell by pressing Ctrl + C or Right-click -> Copy
- Select the cells where you want to paste the drop down list
- Right-click, select paste special, click on Validation and press OK.
Note: You can also do a regular Copy/Paste operation to paste the list. However, if you copy a cell with a value or formula they will be pasted along the drop down.
How to deal with a workbook with multiple different lists
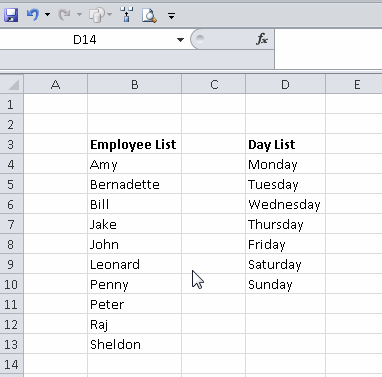
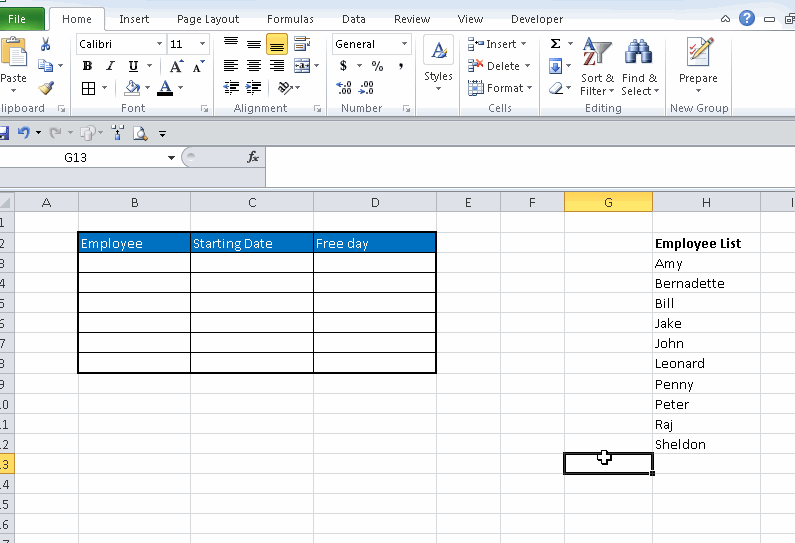
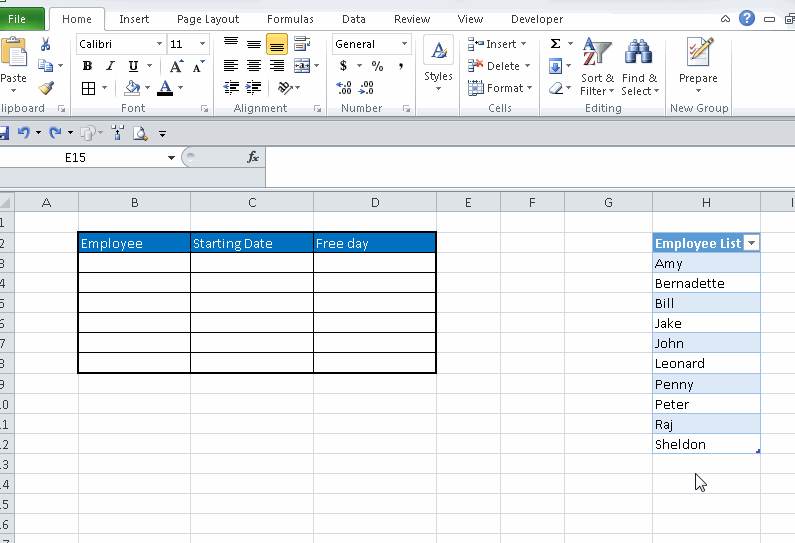
When creating a workbook with multiple different list one of the recommended approaches is to create a worksheet specifically for all the list sources. For example, you can create a worksheet called ‘List Sources’ and place there all the sources for your lists.
In addition, is a good practice to name the lists so you can easily refer to them using their name. To name a list, select the range that contains the list elements and enter the corresponding name in the name box.
 Then you can use the names of the lists in the Data Validation dialog box
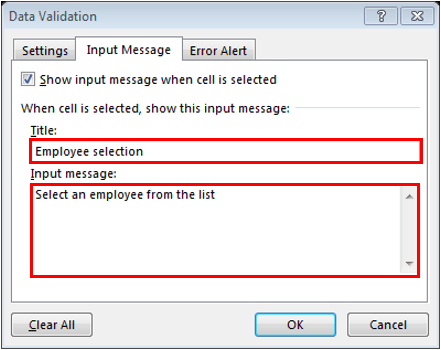
Display a tooltip when a cell with a list is selected and when a wrong value is entered
To help the users of your worksheets you can display a tooltip when they select the cells that contain a drop down list or any other type of data validation.
Once you’re in the data validation dialog box, click on the Input Message and enter the title and message you want to display.
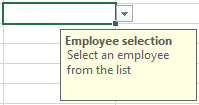
 The tooltip will look like this
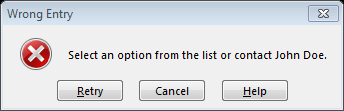
 To show a message when the user enters a wrong value in the cell:
Go to the Error Alert tab within the Data Validation dialog box
Enter the title and error message you want to display
 The error message will look like this:
Create an expandable drop down list
If you work with lists that constantly need to be updated and every time you add a new value to the list you need to go the Data Validation dialog box and select the new range, there’s a workaround to make your life easier.
The trick is very simple, just convert the list source to a table and you’ll be good to go. Here are the steps:
1) Select the range that contains the source for the list
2) Convert the source range to a table: Go to Insert tab, click on Table and then click OK.
A faster way of create tables is to select the desired range and press Ctrl + T, then press Enter.
3) Create the drop down list and use as a source the table you just created.
 And that’s all!
See below how the drop down list automatically captures new values when you add them below the list.
Create dependent drop down lists
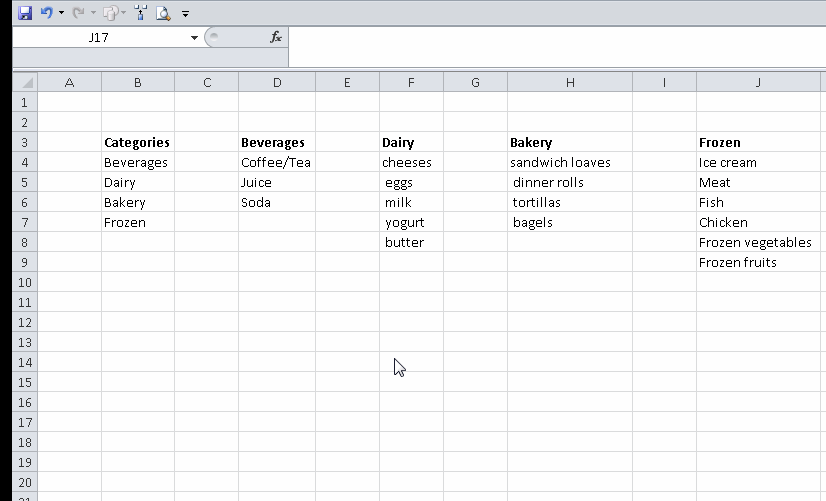
Another thing you can do is to limit the choices in a drop down list based on the selections of another list. For example, if you select ‘beverages’ in column A, then only beverages appear in column B; but if you select ‘Dairy’ in column A then only dairy products appear in column B. See example below:
 1) The first step is to create a named range for each option of the main list.
For example, if the main list is composed by Beverages, Dairy, Bakery, and Frozen, then you should create a named range for each option.
Notice that each list MUST be named exactly as the corresponding option in the main list.
2) Then create the drop down for the main list
3) Then create the drop down for the sublist using the INDIRECT function
Type =INDIRECT(<Address of cell with main list>)
In the following example the main list is in cell A5, therefore you have to go to the cell B5 and create the drop down list using =INDIRECT(A5) as the source. See example below: