This is the 5th post of a series that covers everything about importing all files in a folder into Excel using a tool called Power Query. Click here to see the series.
In this post, I’ll show you how to import the contents from specific cells of all files in a folder.
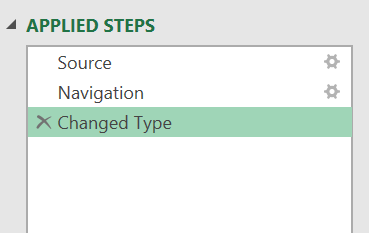
For example, in the file below, we might want to take the Customer ID, Customer Name, and Subscription Date and put them next to the transactions data.
![]()
First, import the file into Power Query: Data ® New Query ® From File ® From Workbook and click Edit.
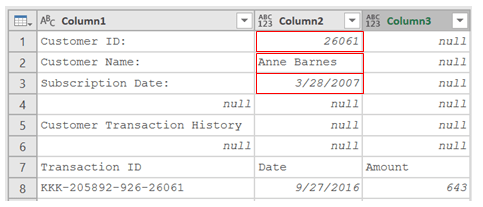
The data should look like this.
![]()
To get the content of a cell use the following structure:
=#”StepName”[ColumnName]{RowNumber – 1}
After you import the data, Power Query should have created the following steps:
The data of interest is in rows 1, 2, and 3 of Column2.
Therefore, the formula to extract the content of each cell is:
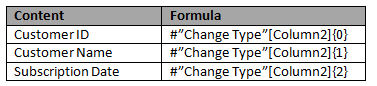
Once you know the formulas is very simple to fill a column with this value. Just, go to Add Column → Add Custom Column, enter the formula and click OK.
For example:
![]()
After adding the three columns you should see something like this:
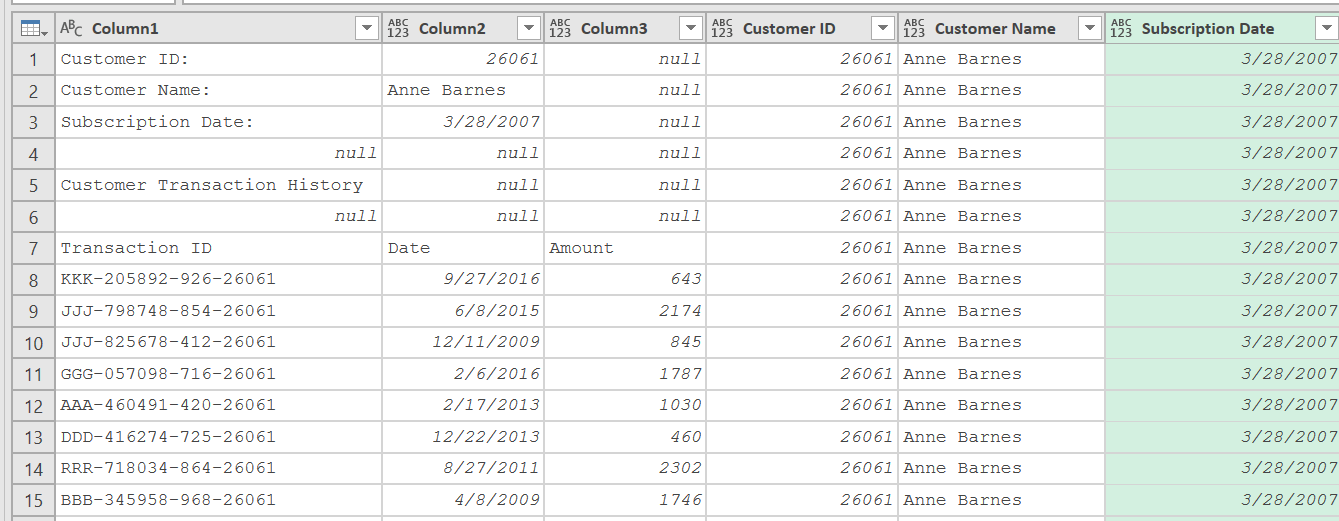
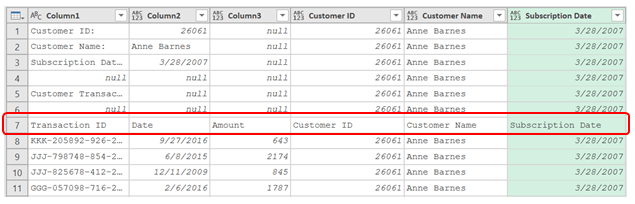
As you can see we have the data we needed in the last three columns. This might seem OK but it isn’t.
When you remove the first 6 rows and promote the headers, this is what you’ll get:

As you can see, the data from the columns became the headers and we definitely don’t want that. In order to solve this issue, we will need to use a bit more complex formula.
Rather than entering the formula =”StepName”[ColumnName]{RowName – 1}, use the following custom column
Go to Add Column → Add Custom Column
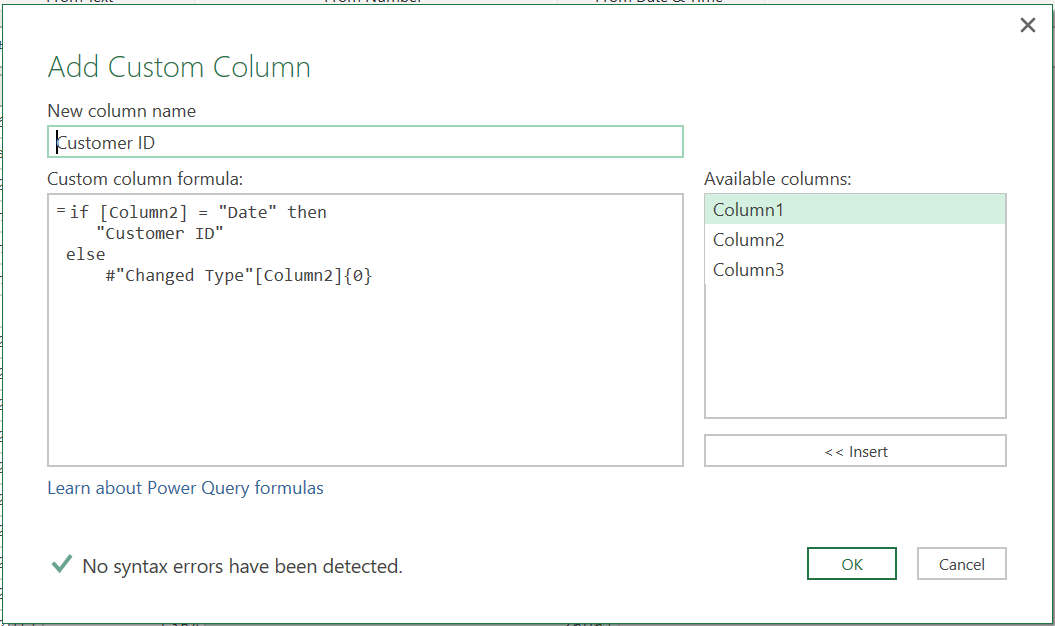
Notice that what I’m doing is to write appropriate headers in the header row. After doing the same for each column, the data should look like this:
Then after you remove the top 6 rows and promote the headers, you should have the appropriate result:
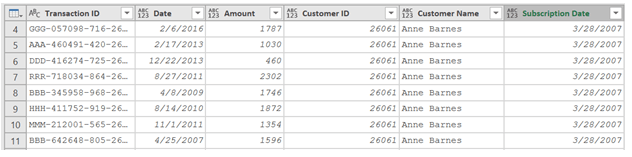
Then you can change some data types, e.g. change the data type of columns Date and Subscription Date to Date and the data type of the column Amount to Currency.
Finally load this to the workbook.
OR if you want to apply this to all files in a folder, convert it to a function following the steps shown here.
I tried to cover as much as possible about this topic but if you encounter any other challenges please let me know.
Subscribe to the blog to learn more about Power Query and to get notified when I update this post series.